Monday, October 31, 2011

Christmas copy-cat

I'm linking up with Debbie for her magazine copy-cat challenge party...

These are decorations I made last year (is that cheating?) and I really wanted to do something Christmasy for the party!   

I put up fall stuff the first day of September and although our summer was pretty short, I just couldn't wait.  My husband called me out on it too: "It's still summer!!  And I have to admit that as much as I love the fall colors and all, I'm ready for some red, green and sparkle!!  

I couldn't find anything in any of my holiday magazines to make in the last couple days, so I'm recycling this idea.  :) 

I bought the Farm Chicks Christmas book last year and fell in love with the little trees they had made and figured they would be easy to replicate.


(mine)

They were...just a lot of time spent wrapping styrofoam cones.  I had the most trouble with the paper wrapped one, but that was probably because I didn't have a lot of patience on this particular night.  I just wanted them done already, lol!!

(Serena's)

I'm going to make more this year and utilize our new bookcase as it has cubbies.  There are lots of cute ideas and eye candy in that book.

I love me some Farm Chicks...the summer show is lots of fun, but boy I wish there was a holiday one, too!!

OK, well I'm off to check out the other party go-ers!!

Monday, October 24, 2011

I'm not sure about this and a linky party

When I bought this shelf I liked it, but after a year it started to seem so dark.   I tried to lighten it up by putting different colored frames and what-not on it, but no dice.


So I decided to try out some Annie Sloan Old White on it.  At first I thought it was a total lost cause.  It seemed super blah.  Then I distressed it here and there (the front part is metal, so I thought it had an old ceiling tin feel to it) and thought it looked better. Then I distressed it a little more and that helped.

I hung it back in its spot last night and it still hangs there.  Naked.  I think it has the feel of an old mantel I could have found in a cool old farmhouse.  Maybe.  If I squint my eyes just so....


What do you think?  Did I wreck it?   Be honest.  I can take it. 
;)

I'm linking up over at Debbie's for her Newbie Party.


I've never been big on the linky things until lately.  I linked up just a few (Debbie's Copy-cat party was the first), but I realized that they really are fun.  So I put two and two together: Debbie seems like a fun girl and add to that a linky party and I bet it's a rockin' good time!

I'm off to check out the attendees....

Thursday, October 20, 2011

The entryway table

I'm linking up with Miss Mustard Seed for her Furniture Feature Friday Party!

~

I've always wanted a proper entry.  In Southern California there aren't a lot of houses that have such things.  So you can imagine my glee when we moved into this house in Washington and it has one!  
One problem.  What the heck goes in it??  

It sat empty for a long time...until this past August to be exact.
  
I finally got tired of looking at the random stuff I put in there trying to figure it out and went on a hunt while the boys were on a camping trip.  I mean, what better time to hunt than while alone? No dinner to make, no one to entertain, no one but me!!  :)  While making the rounds of all my favorite thrifting places, I hit Spencers Antiques last. I should have gone there  first.  

I found this table in the last booth I looked at.  Perfect!!


  Just a few random things I wanted in this space.  

After shopping the house, I came up with about 95% of what is in it now.  It was quite a relief since I didn't want to be out shopping anymore.  I wanted to be fiddling around!


One day I got sick of all the brown and remembered an 'oops' paint I had and decided to paint.  I sanded the top and realized under the ugly brown was some nice wood.  I didn't have any stain on hand, but I did have scratch cover.  So that's what I used along with a poly coat. It turned out pretty OK if you ask me.  

During a recent trip to Seattle I found this rug at Ikea. Side note: you have no idea how much I dislike being 4 hours from Ikea.  I used to be 10 minutes from one.  
The chair is also from Ikea and the pad is from Homegoods years ago.  The gum dispenser belonged to my grandparents.
(I'm fairly embarrassed to say that the gum in there is about 3 years old.  Yuck.  Thankfully, nobody wants any!)


The long basket here is also from Spencers and has 5 wire dividers inside, so I used it to put canning jars in each one to hold flowers in the beginning.  When they died, I used it just to fill space, but I love it! To keep some small things organized I found three wire baskets (I couldn't decide on a color, so we each got our own color) to throw hats and floppy purses and such in at the end of the day.


It looks really blue in this ↓ picture, but a truer shade is what you see in the shot above.  It's a flat paint and at first I wasn't sure about it, but in the end I liked it a lot. I distressed it here and there and love these little nail holes.


One of my favorite things about it are these little curvy bits.  Second to them is the top which is two wide slats of wood with a few marks here and there and a bit of a gap between them.  It has a great lived in feel that I love.


I finally feel like this area is finished thanks to this find.  Of course there's always something to rearrange or redo altogether. I love to keep the front door open now and I'm not embarrassed when someone comes a callin'!  :)

(I apologize that my pictures are more on the yellow side than I would like.  It was nighttime when I took most of them, but they do get the point across!)

Peaches for grandma

I had packed up some peaches to send to grandma and after I had it all wrapped up, it occurred to me to cute it up a bit.  Why that didn't occur to me in the first place is beyond me....after all, I have a room full of stuff to cutify things.  Doesn't mean I always do though.

A couple years ago I bought myself a Cricut machine for Christmas and have only used it a handful of times for things that nobody else sees.  I need to change that since there are so many neat things to do with it!


Anyway, I made this using a jar stamp I bought to make tags when I gave jam as gifts a few years ago and the 'Preserves' cartridge.  (These cartridges are chock-full of items to cut out...it's amazing what you could do even if you only had one or two!)  In this instance I would love for the word to have been 'peaches', but hey, what're you gonna do?  :)  

It can be a bit time consuming to get all the paper choices made and layer everything when you're done, but it's totally worth it.  The options on the Cricut machine are pretty endless.  And they're pretty easy to use which is good for my non-techy self.  ;)

The little hearts were made using a Martha Stewart heart shaped hole-punch and added only because somehow when I was finished with this, I managed to get hot glue on it and in trying to take it off, some of the paper tore off!!  grrr....

At any rate, they add a bit more love, right?  Right.

(these opinions are mine and I'm not being compensated in any way for them)

Granny blanket

While driving by a local thrift store I saw this beauty in the window.  I kept thinking about it, so I raced back hoping it was still there.  It was.  It was $5.  It was mine.


I love its colors (it reminds me of the Brach's neopolitan candies that I love so much) and the fact that it isn't ginormous.  It's a little bigger than a lap sized blanket and perfect for me when I park myself in the corner of the couch.


:)

Tuesday, October 18, 2011

Duh

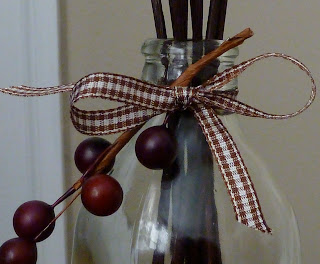
While at the Yankee Candle store the other day (there's a new store opening in my area and they offered BOGO...yay!), I noticed a little set of three glass jars with the scent sticks for Christmas.   

They were really cute; little red, green and brown jars with a little ornament style adornment
tied with red gingham ribbon.  At that moment I had an epiphany.  :)


I thought to myself "Hey, I have a small jar from the goodwill and they have the 
refill scents and sticks here.  I'll make my own."

Duh.

So I did.  This isn't the exact jar, the original one is smaller (and cuter as it has 'third pint' embossed on the neck) but I found this one today and since it has a smaller opening, I knew it would 
be better since that way the liquid won't evaporate as fast.

Or so they say.


 I tied on my own ribbon and thing-a-ma-bob to decorate it.
The scent I bought is Spiced Pumpkin and it smells yummy...just enough scent to blend with 
the candle I bought (Nature's Paintbrush. It's new and has a soft leafy scent) for fall.


I used a little thrifted dish and these little seed/pumpkin looking things to give it a little more
fall 'oomph'.  What I love best about this is the endless possibilities season after season.

And that, folks, is my 'duh' moment for the week.

Oh, right, who am I kidding....there will be plenty more before the week is up!!   ;)

Saturday, October 15, 2011

In the Kitchen: Pumpkin Spice Whoopie Pies

I'm not a huge fan of marshmallow in it's 'natural' state and marshmallow creme holds a close second to that so I wasn't sure how I'd feel about these little guys.  As I read the recipe I saw that 
the filling calls for marshmallow creme.  
ick.  

(The funny thing is that I had a full jar in my pantry...I have no idea why considering I don't use it. hmmm.)

But guess what?  If you mix it with butter and powdered sugar it's amazing!!!  ha!

I found this particular recipe on Julie's blog, Joy's Hope,  and she found it on Pinterest.  

(She has 3 super cute girls, a new baby boy and a story I can unfortunately relate to.  If you read Joy's story, you'll 
understand what I mean. Anyway, her family lives in the same area we did before we moved, so I feel a 
certain kinship to her  for those reasons, although I don't know her personally.  Corny, I know, but hey...)


They are THE BOMB!!  They have the lightest pumpkin flavor and that filling....oh my goodness.  I don't even need a stinkin' whoopie pie to eat it!  Just give me the dang spoon already!!

I used a whoopie pie pan and as good as they are at holding the round shape, they leave little to be desired in the process of getting the dough flat.  I sprayed the bottom of a measuring cup to help press down the top a little bit, but they still were a little poofy.  Not a big deal, really, just something that I came across....

Anyway, here's the recipe:

Pumpkin Spice Whoopie Pies
COOKIES
One pouch sugar cookie mix. 
1 tbsp flour
1/2 c canned pumpkin (not pumpkin pie filling)
1/3 butter, softened
2 tsp pumpkin pie spice
1 egg

FILLING
2/3 c marshmallow creme
1/3 c butter, softened
2/3 c powdered sugar

Preheat oven to 375*
1. In a medium bowl, stir together cookie mix and flour.  Add remaining ingredients.  Mix well.

2. Scoop (I use a cookie scoop, but 1-2 tablespoons should fill the cup 2/3 of the way...or a tad more) into pan.  If using a regular cookie sheet, drop 2 inches apart.

3. Bake 8-10 minutes.

4. While baking, mix filling with an electric mixer.

5. Wait for cookies to cool completely before adding filling and assembling.  I rolled ours in some fall-ish  sprinkly balls and also some mini semi sweet chocolate chips.  So good either way!!  

ENJOY!!!!!


Friday, October 14, 2011

Paint & pie

I'm doing it.  I'm painting my great grandma's hutch.  Old White.  With a duck egg-ish blue inside (not Annie Sloan's Duck Egg, but a very close 'oops' paint I found.


I also bought some cute vintagey strawberry hooks to put on the wall to the right.  On those I'm gonna hang some of my great grandma's aprons. 
(to the right is the laundry 'room/closet, so I can't center the hutch)

Also, I had coffee and homemade peach pie for lunch.  
SOOOOO GOOD!


I have been up to my eyeballs in peaches and I just couldn't can another jar, so I decided to make peach pie.  I can't believe how easy it is...I had enough to make two more so they're in the freezer waiting to be baked.  Can't wait.....

Friday, October 7, 2011

In the Kitchen: Roasted Potato and Green Bean Salad


I don't remember whereI found this recipe, but it's so yummy! The ingredients are simple, but have good flavor and texture when it's all done. You simply quarter the potatoes and onions and cut (or snap, depending on your time frame...I remember snapping green beans with my great aunt a long time ago :) ) the green beans to a size your family appreciates, unless you like grumblings at the table about how big the pieces are. 


One reason I love this is because the potatoes are soft, the green beans are crisp and the onions, oh my, the onions!, they are perfect.  Their tanginess (I would say sweetness, but that was vetoed last night at the table) is just wonderful!!!

After it has done its time in the oven, toss it in the dressing (while still hot) and try not to eat too much of it before it finds its way to the plate!


I personally think this goes with all kinds of main dishes, but last night we had it with rice pilaf and stuffed salmon (from Costco, and I must say that although I'm not a big fan of seafood, this was really good! The pieces were huge though, so we cut them in half and still had enough on our plates.)
Anyway, if you're into dishes like this, I suggest you try it and soon!!

Roasted Potato and Green Bean Salad

Preheat oven to 425*

2 lbs. red potatoes, quartered
1 large red onion, quartered
1 lb. green beans, cut to desired length 
3 tbsp. olive oil
2 tsp. lemon juice
2 tsp. mustard
1 tsp. worcestershire sauce
salt and pepper to taste

1. Put potatoes and onions in a large roasting pan sprayed with non-stick spray. Drizzle with 1 tbsp. or more if necessary and sprinkle with salt and pepper.  Roast for 30 minutes.

2. After 30 minutes, toss in green beans (you may decide to add a touch more olive oil and s&p, I always do). Roast 20 - 25 minutes longer (depending how small you cut the potatoes, it may need more time).

3. Prepare the dressing.  In a large bowl (I use a Stearlite bowl that has a snap on lid so I can shake it upside down and all around) whisk together 2 tbsp. olive oil, lemon juice, mustard and  worcestershire until smooth.  I've found that adding a little more of any of these is pretty harmless, so it won't be ruined if you like more or less of any of these ingredients.  When the veggies are done, simply put them into the bowl with the dressing and make sure everything gets covered.

ENJOY!

This can be eaten hot or cold, but preferably hot.


Saturday, October 1, 2011

Dear Blogs and Pinterest,

You both make me feel so bad.  
For all the pictures I didn't take.  
For all the pictures I do take that don't compare to the ones I see in your worlds.  
For all the crafts I don't make.  For being lame in the sewing department.  
For not making a huge deal out of every single thing that happens in my life...
even when I know it is a huge deal.
For keeping me up way past my bedtime. 
And so many other things...
But I would like to thank you for all the interesting people I have 'met'. 
And all the beauty they bring to my everyday life.
It's truly amazing the things I can see with just the tap of a few buttons.
~Kori